One of the things that I was unhappy about on the old coop was that the pan and tilt webcam, controlled the interior lighting via a couple of 1 Watt LED's. The idea was to keep power levels low and make the light directional to whatever the Webcam was looking at. However, the wavelength of the light wasn't in the same range as the webcam, so although it technically worked, the camera was soon abandoned as other things were more important to fix first. Also, being an internal webcam, it didn't cope well with life outside. The microphone quickly got gummed up with dirt.
I wanted to improve this in the version 2 platform. The solution is fairly obvious, 12V DC under cupboards lights are now common in many houses and LED strips and the related tubing is easy to source and quite cheap and they can be joined together if required for longer runs, however the strips are not waterproof. The main risk with these is that they can get quite hot and that is never a good thing for a wooden box that is full of straw, with a tar roof. Chicken BBQ's are good, but not when you want the chickens for their eggs. This problem is not exclusive to Chicken Coops. Interior lighting under cupboards must not set the cupboards alight either due to thermal transfer.
I found a number of suppliers that had thin metal clips that stand the lighting off of the fixing surface and the metal used does not conduct the heat easily. The clips are easily installed into the roof beams via a small screw and the small stainless steel spring clip provides a secure way of fixing to small channels in the aluminium bars that provide a heat sink / dissipation for the LED strips.
LED strips are stuck via self-adhesive strips onto the aluminium channel. The whole thing is sealed up with an opaque diffuser strip which is a tight push fit and should be fairly water tight. The diffuser will give a nice even light through the coop. The strips come in 1M lengths and although the coop is longer than that (1.6M internally), one bar in the centre on each of the two roof beams gives plenty of light. This is good as it means that I've not got to waterproof the joints, just the ends. The ends of the channels are decoratively finished with push-in plastic caps, some of which have holes for the wires to go through. The easiest way to deal with this is with a little clear silicon sealant, which as the saying goes, works until it doesn't.
The two strips were connected in series with each other, making a large U shape on the ceiling with one wire coming back to the main unit for power and control.
Simple PWM LED's
Its worth mentioning at this point that there are different types of LED strips, some are just a string of LED's, all connected in parallel and two wires go to them, you put a voltage onto that and the LED's light up, these can often have their brightness controlled using pulse width modulation (PWM), where the output is switched on and off rapidly and that limits the amount of power available to the LED's. A large capacitor is used to smooth out the switching.
An enhancement on these type of LED's is a 3 wire LED strip, where the power rails are always on at a stable voltage and the PWM control is a separate pin. This is cleaner from a noise and switching perspective and scales better in longer strips. Each LED controls its own brightness with a transistor within the LED.
Serial LED's
The other main type are serial LED's, these are effectively a very cheap / simple microcontroller that accepts data in via a shift register, but if you send more data than it needs, it will simply shift out the earlier bits on another pin that goes to the next serial LED in the strip. The result is that with a single IO pin on a driving device such as the ESP32 in my case, you can fill a huge shift register that controls tens, hundreds or even thousands of serial LED's
Once all the data has been clocked in, the bits that end up in the local shift register within each unique serial LED is then split into the different colour components, this is either RED, GREEN and BLUE, or RGB and a separate White (RGBW). The various bits that control brightness for each LED colour are then driven via PWM into each element, producing the required light level.
Being a shift register, by changing the data at regular intervals, effects such as changing colours or marching a colour pattern along a string can be achieved with little complexity. A common Serial LED chip is the SK6812. Adafruit has a library called NeoPixel that handles a variety of such LED strips using a number of chip types.
Another design change
When I originally designed the PCB's, I was thinking about the serial LED (NeoPixel) type LED bars and as some require a 12V power supply due to the voltage drops on long strings. Others have 5V power requirements. Given how they are chained up serially, I put 3 connectors for 3 such strips, not really considering how the return serial data would get back to the controller board in the real world. The answer is that it would work, but would look messy, with extra return wires being needed at the far end of each strip.
Then I found that the sizes of the strips are not the same, since the chip based LED's are larger, since they have more electronics in them, this in turn means that the LED strip aluminium channels have to be larger. The ones I had ordered didn't didn't fit the aluminium LED strips that I purchased, nor did the PCB design allow dimming of ordinary LED strips, I had overlooked that.
Realising that I already had a couple of spools of white LED's of the PWM variety that would fit the channels I have, I undertook a little re-engineering, resulting in a couple of cut traces and a few more bodge wires, to change being to remove the digital on/off inputs to the drivers and replace them with PWM signals, so the current boards now support different LED strips in the following configurations :
- A 5V power feed that can provide one of the following
- Provide a PWM output for dimming ordinary 5V LED strips
- Provide a fixed on/off power feed for serial LED's
- A 12V power feed that can provide one of the following
- Provide a PWM output for dimming ordinary 12V LED strips
- Provide a fixed on/off power feed for serial LED's
- A serial LED digital output, running at 3.3V, that can be used as the serial data output for 1, 2 or 3 serial LED strips
(i.e. the original design)
The restriction is that there is only one of each power feed, since there are only two driver transistors on the board and if its used for one function, it can't be used for another at the same time. The next generation boards has more flexibility with each port being separately controllable. A further enhancement for the next board is to add a second 5V power rail that is used exclusively for all the external components, keeping the existing regulator dedicated to powering internal devices only. This will be more stable as it will generate less noise and any external fault can not impact the internal workings of the box.
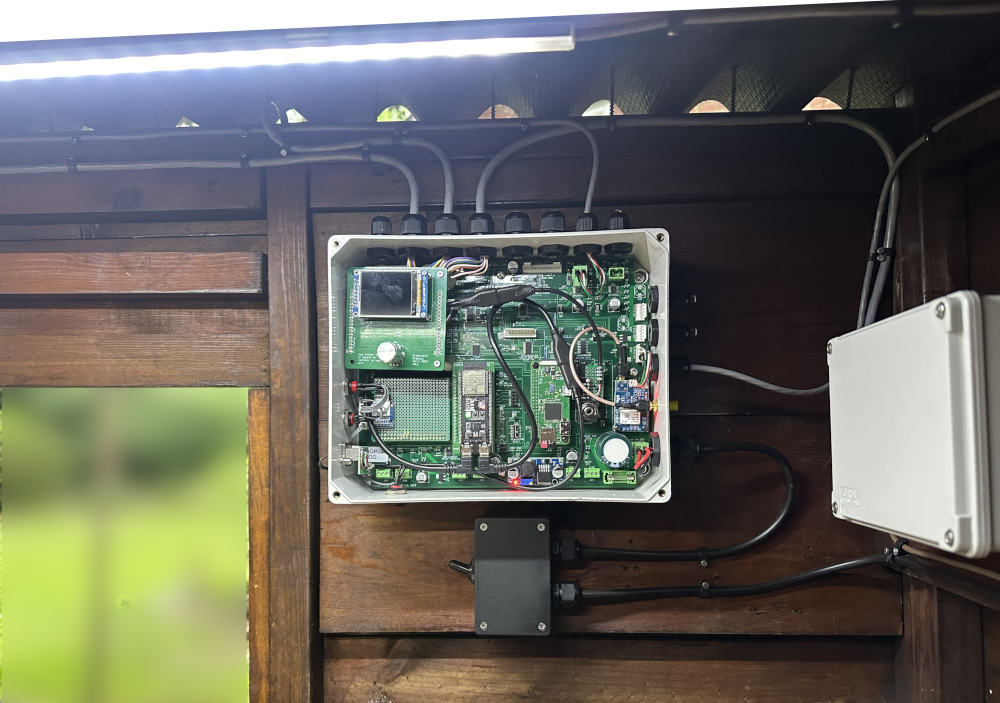
Installing the interior light
Luckily, I had identified the problem described above, before installation and the main board that was installed, already had the modifications in place, so now all I needed to do was to install it.
The strips I have are 12VDC, ordinary LED strips. The code was already present to handle the relevant events such as turning the light on when the main door is open and setting bedtime light to turn them on 25 minutes before the door closes, so the chickens can see the roosting bars. The lights always fade in and out, so that its not a shock to the eyes.
After completing the physical install and terminating the cable within the main enclosure, the lights jumped into life, just as they had on the bench weeks earlier.
The results are great. Clean crisp light in the coop. This is a significant improvement over the previous system.
The result makes a big difference when it comes to cleaning, since you can see easily into all areas of the coop. Similarly, when maintenance needs to be performed in the enclosure, that is easy now too. I no longer need to reach for my head mounted torch and get the light in the right place when working on the coop.