
With the old electronics and the roof removed, the preparation and repairs can finally start. the unit was thoroughly cleaned with the bucket trowel, which is handy for removing the dried mud / poo / straw mix that gets into all sorts of places, it can also get under a lip in the nesting box, onto the roosting bars and the other vertical joints in the coop that the girls like to roost on.
Pressure washing was next, removing all the dirt and debris from the wood and creating a bit of a swamp in the coop in the process. The bottom of the unit can't be reached since its on a couple of bricks, so that will have to be done separately at a later point in time. The drain holes that were installed in previous years are once again blocked, so these are drilled out again and the coop can start to dry. Nothing more can be done today as the coop must be dry again.
During cleaning, some of the black marking on the wood came off, as did the white mould in the picture above. This left the wood in a better state than expected. Luckily, the day turned out to be sunny and windy, which was ideal as the wood will dry much more quickly.
Minor rotting was found in some of the upper bars and the wood was removed and replacements cut ready for installation, after wood preservatives could be added. The dry new wood was given its first coat of wood preservative.
In the evening, the rubber mats that simplify cleaning were able to be re-installed and the old roof was temporarily re-affixed with a small number of screws. It would leak badly if it rained due to all the screw holes, however rain was not forecast.
The conservatory
The base unit gives lots of extra space to the chickens that is protected from the wind and rain, but being on the ground throughout the year takes its toll on the unit. Maintenance was clearly necessary and to re-preserve all the wood required a nearly full strip down. The perspex sheets prevent any movement of the frame, so removal of the sheets means removal of the conservatory, this is one of the reason it was removed towards the start of the process.
The rusty and stuck screws holding in the perspex were persuaded to come out with a hack saw to clean up the slotted heads and an impact driver to break them free. The perspex was then able to be removed, Everything was then cleaned with the pressure washer and the extent of the decay in the wood that is in contact with the ground could be seen. The entire bottom of the unit needed replacement, so replacement wood was sourced, cut preserved and applied the following day to get the unit back on track.
Getting ready
Although everything was clean, it will not stay like that for long with Chicken around, so there is a trade-off of waiting for things to be really dry over say a week, to achieve better penetration of the wood preservative, vs getting some preservative onto the wood to protect it and letting it soak in. I have had good success with Barretine Wood Preserver over many years and its my go-to for outside wood. The colour is Summer Tan, which is a nice golden colour when it first goes on, but it darkens over successive coats on some woods, but on others it will fade a bit over the years. The preserver seems to be easily absorbed into wood, even when its not perfectly dry and the colour always comes out fairly uniform, even if its a bit off during initial application as some bits are wetter than others.
The inside and outside of the coop can be done at different times, which reduces the drying time as there is less of the solvent to evaporate. There is also the bottom of the unit, which is currently inaccessible, due to it being a bricks height off the ground, this is an any-time job as its not critical to the upgrade. Several days passed, drying out the wood, re-cleaning with a sponge where necessary, installing the replacement wood for the rotted areas, applying the wood preservative liberally inside and out with a minimum of 3 coats, then once it was all dry, replacing the roof and fixing the damaged nesting box.
The results are quite pleasing. You can see the mud on the bottom of the unit, just days after it was fully cleaned, but such is life when Chickens are around. The left nest box is currently wetter than the rest, hence the colour difference, this went away after a couple of days, once everything had dried.
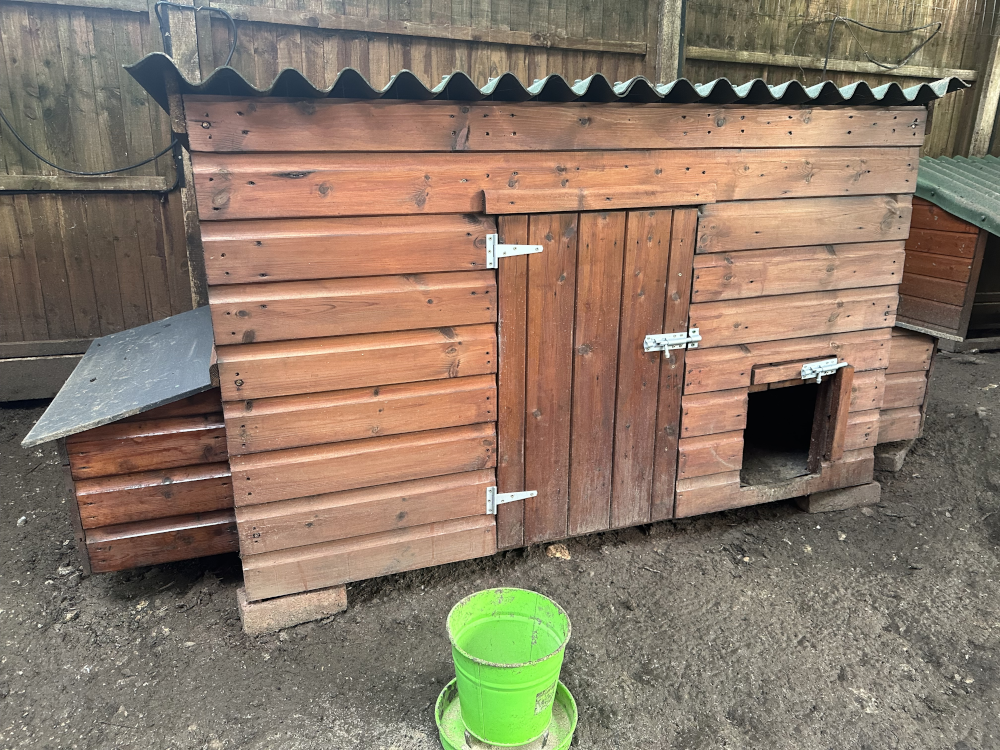
Mud is not constrained to just being on the ground, since chickens have feet and wings and seem to be very good at parkour to bounce off other objects to get where they want. to be, even if it takes multiple attempts. You can see the mud across the brand new roof, where they went to explore.
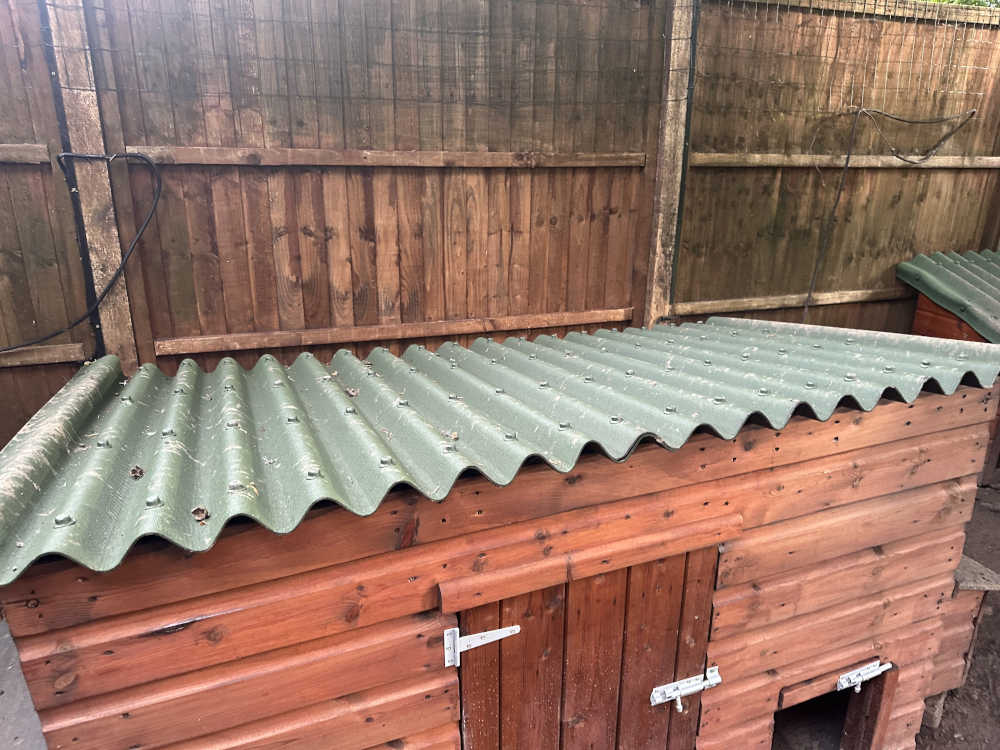
The roof is simply an Bitumen corrugated roof sheet, as would be used on sheds and other outbuildings. The fixing screws are applied in the peaks, so that water runs down into the troughs which are intact, hence reducing leakage.
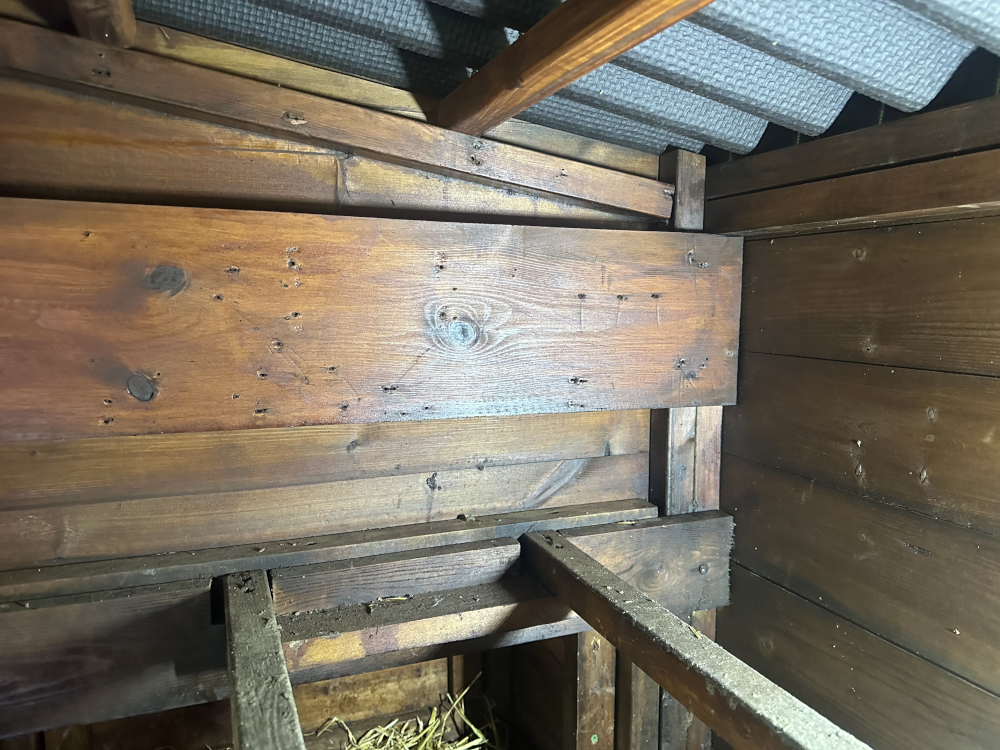
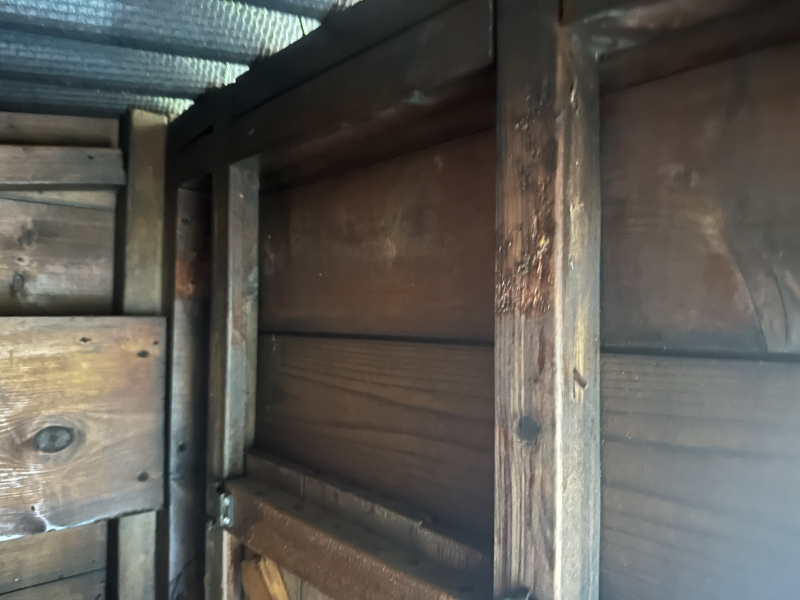
Similar results were achieved inside the coop as can be seen here, this is the back of the house. The horizontal wooden bar being where the charge controller will be placed. The new roof bars and new roof can also be seen.
The corner where the main control box and the power sensing module will go has also come up well.
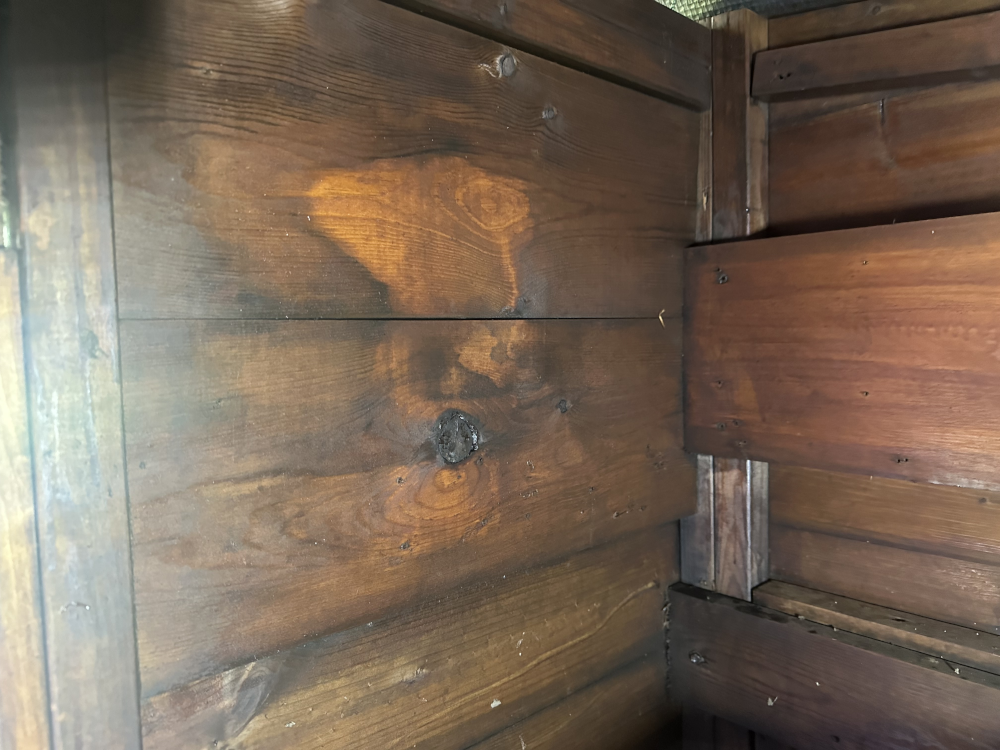
The door motor mounting area, which had black and white mould on it has come up well. A couple of pieces of wood had to be replaced where the leak had been. The marks to the right upright are due to the motor fixing holes and the cable clips for several cable runs. These will be covered again once the new installation is completed.
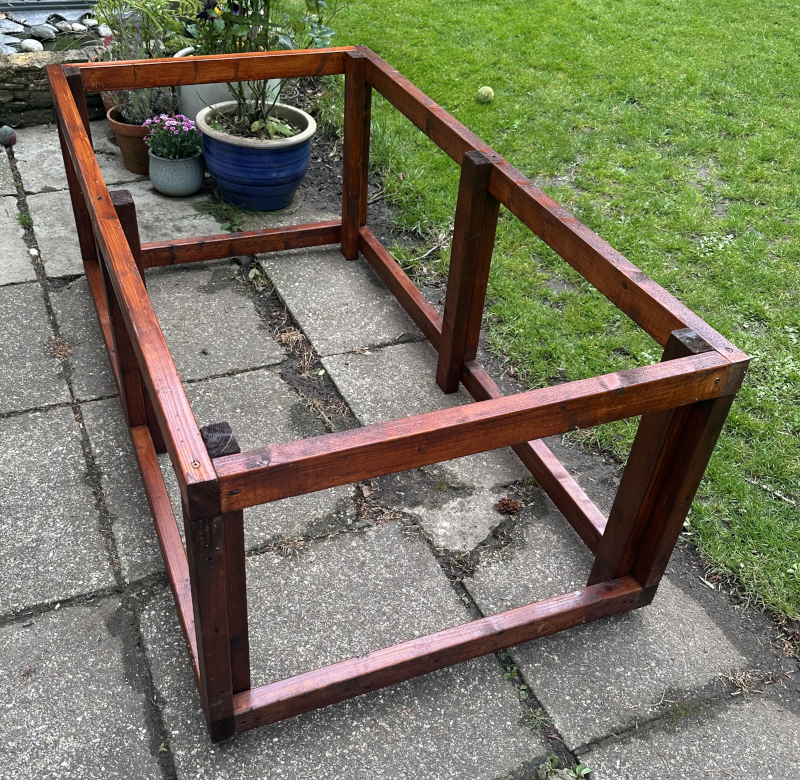
The conservatory frame has also come up well, it just needs the perspex sheets to be reinstalled with new screws all round. This is done and the base is reinstalled under the coop, which in turn allows the bottom of the coop to be accessed in a fairly safe manner, cleaned with the pressure washer, dried and multiple coats of wood preservative applied in the coming weeks, but that is a non-critical task that can be done any time.
The frame is shown upside down, the small turrets on each upright are what lock into the base of the coop, ensuring that both the base and coop remain locked together, since no movement is possible and there is the downwards force due to the weight of the coop.
Finally, I am in a position where I can start bringing the new system up.